Product Reports
Guidelines for Specifying Architectural Ironwork

By Robert Walsh
I have been an Architectural Blacksmith for 35 years. Gates and railings. A person would think after spending 35 years working in what looks like a relatively simple profession, they would have all the answers. Well, neither is architectural blacksmithing as simple as it looks, nor do I have all the answers.
I have however, seen a number of wrought-iron jobs come up short of what they could have been. When looking at these jobs, it is apparent that if one or more of 6 considerations would have been addressed, this ironwork would not have the problems it has now. The 6 considerations are: (1) Construction methods, (2) Rust considerations, (3) Material choices, (4) Finish options, (5) Installation, and (6) Samples. Let’s go through these topics.
Construction Methods
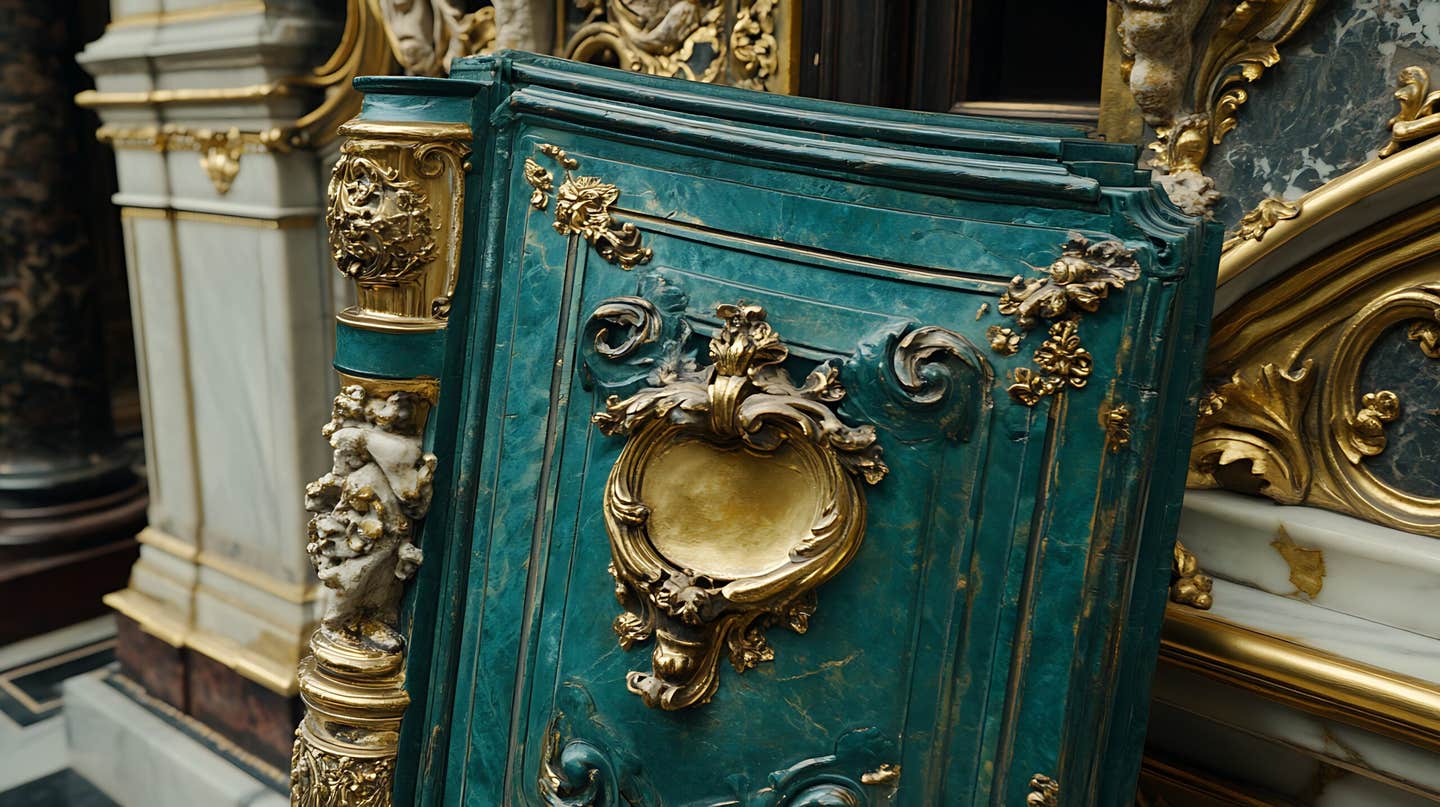
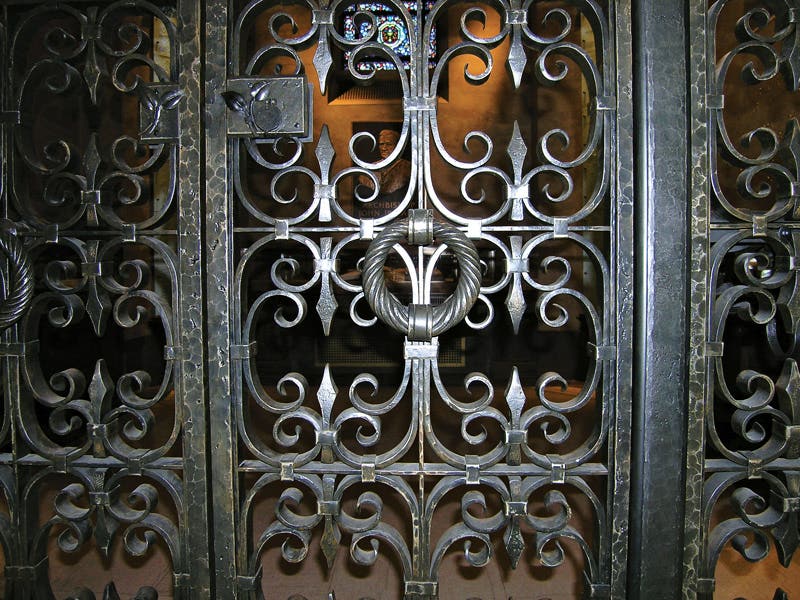
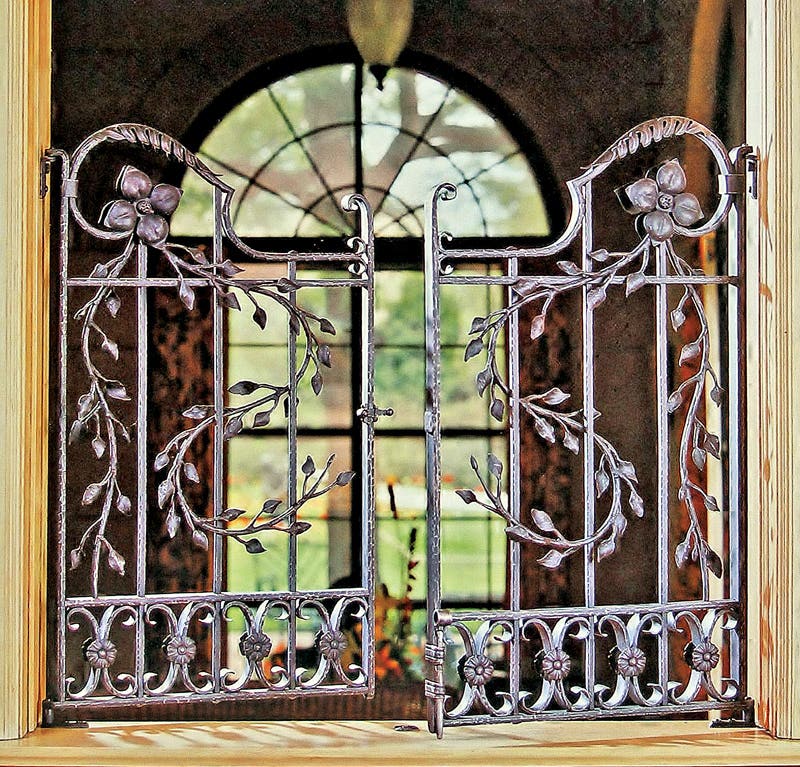
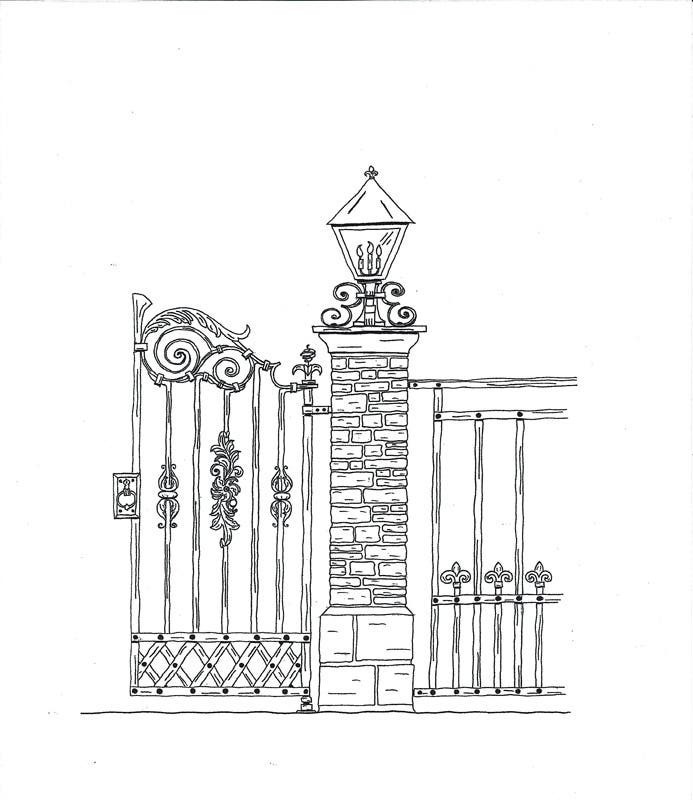
Historic ironwork was often constructed as per sketches #1 and #2. Contemporary ironwork streamlines the construction process for the masses, as in sketches #3 and #4. The advantages of contemporary construction are production speed and watershed. The advantages of classical construction are many, one of which is the detailing rivet construction gives the ironwork.
If you look at sketches #1 and #2 and think about water and rust, you can see that with five pieces overlapping each other there are definitely areas for water to seep into and create rust problems. If you look at historic ironwork, the rust problems are generally in the areas of overlapping metal. How can we engineer rust out of a product? Three ways to combat or eliminate rust are caulk, galvanizing or constructing with a rust-proof material (aluminum).
Caulk
Let’s think about caulk and your product in the design stage. First, how much caulking will need to be done? If you have a simple short railing, maybe caulking the joints will be the way to go. Or if you have a large project with only a few joints that will be rust prone, then caulk them. Or can you design your project so the parts in question can be removed to somehow facilitate better paint coverage? These decisions are weighed against galvanizing or constructing with aluminum.
Here are some thoughts on caulking. A person can use paint-able caulks, but paint-able caulks are not silicone. Silicone caulks have produced better results than the non-silicone products I have tried. If you use clear silicone in your joints, it will be invisible, initially. However, after a couple years, the wind carrying dust will abrade the clear silicone and it will become milky and quite noticeable. Whether using clear or a colored silicone, to minimizing the caulks appearance, apply it as follows.
After painting your metalwork, mask off the sides of the joints to be caulked, using painters tape. Keep the painters tape close to the joints so your caulking areas are minimized. Then apply your caulk and because the silicone sets up quickly, immediately after applying the silicone, wipe the joints with your finger or a tool to give the silicone a nice concave contour. Then also quickly, remove the painters tape. At this point, run your finger (or a tool) across the joints again to smooth out the rough edges where the caulk met the tape. With this approach you will get the great qualities of silicone while minimizing the caulk lines.
Duplex Systems
Painting over a galvanized surface creates what is called a Duplex system. With this duplex system, the lifespan of the zinc does not start to diminish until the paint allows oxidation. Meaning, if the zinc has a 60-year life when exposed to the atmosphere (and hopefully more, depending on the air quality) the 60-year life span does not start as long as the galvanized surface remains sealed off from the elements. This is great.
Hot Dip Galvanizing
Galvanizing provides great rust protection. However, even though the metal has been completely submerged into molten zinc, the process is generally not 100% perfect. The process may not be 100% perfect for two reasons. First, when galvanizing, the entrapment of pickling acid in joints and seams becomes a concern. With a good flushing (which is a standard procedure) the entrapment of acid is minimized if your joints and seams allow good drainage.
The second problem is the lack of complete coverage. Zinc cannot flow into tight joints. In a nutshell, when galvanizing ornamental ironwork you get an extremely high volume of coverage, but it is often not complete coverage. On the upside, the seams of tight joints are often sealed up by the zinc, and if not, then often by the primer and paint.
Preparing Galvanized Steel for Paint
A mistake I have seen too many times goes like this. A zinc surface is often sweep blasted by a sandblaster just prior to painting. This blasting removes oxides and gives the slick galvanized surface texture (tooth) for paint adhesion.
There is a hardness scale called the Mohs Hardness Scale. This scale goes from 1 to 10. When this scale is used for blasting mediums, talc is given a rating of one and diamond a rating of 10. When sweep blasting a freshly galvanized surface prior to painting, the American Galvanizers Association specifies blasting the surface with a medium that has a mohs hardness rating of 5 or less. The concern, is blasting (removing) the zinc off the steel.
The sandblasting shops in my area blast with crushed coal slag in various grit sizes. Previously sandblasters used silica sand. Silica sand for blasting has been discontinued because of silicosis. The mohs hardness value for silica sand is 5-6 and for coal slag the mohs value is 7.
Here comes the problem. When taking a freshly galvanized product to a blaster, what you might be told when you ask for a blasting medium of 5 or less on the mohs scale, is that “the blaster will simply turn down the air pressure in his gun. This will achieve the same results as a blasting medium with a lesser mohs rating.”
Turning down the air pressure in a gun works if you are careful with silica sand, but coal slag is just too aggressive. What needs to be done, is your sandblaster needs to order a blasting medium from his supplier with a mohs hardness rating of 5 or less. Typically this will be walnut shells with a mohs hardness of 3-3.5 or corn cobs with a value of 4.5.
Painting a Galvanized Surface
There are a number of very successful ways to paint a galvanized surface. And, there are some predictable choices that will set you up for failure. Educate yourself.
The American Galvanizers Association spells out for you, exactly what works and what sets you up for failure. You can find this information in their website. Google the American Galvanizers Association. Once in their site follow these steps:
•Opening page, upper right, “Education & Resources”
•Education & Resources page, left side “Publications”
•Publications page, left column, scroll down to “Painting over
HDG”
•Painting over HDG page, center right, 2nd listing going down,
“Duplex Systems: Painting Over Hot Dip Galvanized Steel”
Click on the page title “Duplex Systems: Painting Over Hot Dip Galvanized Steel” to open up a PDF. You will be asked for your email and postal mailing address. I find this invasive, but I did it. The American Galvanizers Association invites you to download this PDF, or you can purchase it. The primers and paints in the PDF are found on pages 9 and 10.
Note. When looking at page 9, the Epoxy-Polyamide is “Cured.” The curing time between paints varies considerably. Sherwin Williams Tile Clad 2 High Solids requires 21 days to cure. Sherwin Williams Macropoxy 646 requires 7 days to cure. Diamond Vogel has an epoxy that dries in a day, but is not on the MnDot approved list. My applicator assured me the Diamond Vogel paint would perform well on a large railing job. Based on the applicators recommendation, I agreed to go with the Diamond Vogel product. That was in 2006 and the fence looks great today (2016). We’ll see??
And another note, if you back track and scroll down further on the Publications Page, you will find surface preparation information. This information is also offered free for downloading, or it can be purchased.
Painting Steel That Has Not Been Galvanized
What is the function of an applied finish on metal? The function is providing barrier protection. A protective barrier between the metal and moisture. And this moisture barrier needs to be UV resistant. To meet these requirements, I suggest taking advantage of the tax money you have spent to live in your state. Meaning, what have the state engineers researched and designated for barrier protection on the metalwork along your highways, street lights etc. Applied barrier protection is not going to get any better than this.
Typically the information your state will provide you with is: Two part epoxy primers – for adhesion; high-build mid-coats – adding mil thickness for longevity; UV resistant top coatings – to seal everything up and protect it.
What your state will provide you with will not be one specific brand of products. Instead, you will find a number of approved product brands. In this chart will be primers, mid-coats and top-coat systems within each brand. To see what the State of Minnesota specifications are, google, Minnesota Department of Transportation Paint Specifications.
•Once on the MnDot page, “Approved/Qualified Products.”
•Once on the approved/qualified products page, “Paint/Stain/
Coating Systems (non-pavement).”
•Once on paint/stain/coating systems (non-pavement) page,
“Bridge Structural Steel Coatings.”
MnDot specified (high solids) paints are thick, so I often delete the high-build mid coat for general purpose exterior railings Do what is appropriate for a given project.
Aluminum Construction
The world is changing. I was once at a conference, listening to a blacksmith talk while hot forging aluminum. The blacksmith posed this question to the audience: “If the blacksmiths in the 18th century would have had a rust-proof metal (aluminum) available to create the exterior masterworks in Europe, do you think they would have used it?” Keep in mind, all aluminum looks the same but the strength between alloys varies considerably. Alloy 1100 is extremely soft and a completely different metal than forged alloy 5052 or 6061-T6 when formed cold.
Recently, I was talking with a conservator in Europe who was restoring a famous work in forged iron. Regretfully, this master-work had been restored so many times that it was questionable whether or not there were any original parts left in the composition. And another regret, all the previous restorations were not done well.
Would aluminum have been used if available in the 18th century? Maybe. What you want to consider while on the drawing board, is how much overlapping of the elements will there be? Going back to sketches #1 and #2, the use of aluminum is a logical choice for a product like this.
Next, consider the design (artwork) within a gate or railing. If the artwork has a lot of stringy elements, can they be discretely connected to each other for strength? Will connecting these elements adversely affect the overall design concept? If so, steel is stronger than aluminum so steel might be your better bet.
While on the topic of strength, what works well is bumping up the thickness of your elements when constructing with aluminum. If repousse acanthus leaves are bumped up from 1/8-in. thick to 3/16-in. or a quarter-inch thick, they keep looking better and better. Everybody wins with this approach.
Another consideration is the feel of aluminum. It’s ok to mix metals. Meaning, a fence in front of a home can be made with aluminum and a pedestrian gate in the fence made with steel. Steel will give the gate a predictable feel/weight when being opened or closed. Aluminum is one third the weight of steel. When mixing steel with aluminum, remember to separate the metals to avoid corrosion problems caused by galvanic action.
Painting Aluminum
For aluminum paint specifications, go to the Minnesota Department of Transportation site again. This time in the last step of the search, instead of opening up the Bridge and Structural Steel Coatings page, open up the “Traffic Signal” page.
Blasting steel or aluminum just prior to painting is always a good practice. Blast with a fine or medium grit to avoid excessive tooth on the surface of your metal. Coal slag works well for this.
Installation
When installing ironwork, I do not recommend drilling big holes and permanently grouting railings in place. This process is fast but I prefer bolting railings in place. Drill your stud holes deep and blow the holes out with compressed air. While blowing in the holes, scrub the walls of the holes up and down with a stiff barrel brush. This process will give you good anchoring locations. In these clean and deep holes, install clean studs with an industrial grade two-part epoxy.
If you make a test piece in a brick in your shop, and install a stud correctly, the brick will break when trying to pull the stud out. If you epoxy a stud into a shallow dirty hole, you’re wasting your time. And on another but related subject, single-part glues titled “epoxy” in the hardware store are not what you want. Purchase an industrial grade two-part epoxy with an expiration date.
Bevel the edges of your base plates and size them correctly so they look nice. A drop of Locktite in a painted acorn nut that is just snugged up works well. There is no need to tighten beyond snug when using Locktite.
You want your ironwork bolted (not cast) in place for a number of reasons. First, when your client calls you in 20 or so years and wants advice on how to refinish the railing you designed, with bolts, the railing can be in a truck and on its way to a sandblaster in half an hour. What drove this sequence home to me, was once after installing a large and very heavy fence project in cement, I received a call from the homeowner six months later, informing me that the powder coating was peeling off his new fence. If this fence had been bolted in place, I would have had only one problem – the paint. That same year, another client’s daughter drove her car into a fence we cast in concrete. Unless pressured, never again will I cast ironwork in place.
Samples
Here is a really old story that I hope does not come across as whining on my part. It’s just all too often the way it is. When bidding a job, there are generally other shops bidding as well. Metalwork can vary dramatically in quality. I always push the perspective client to receive samples from all bidders. And all too often, I provide a sample and my competitors provide a better sales pitch and a better price, without samples. You know where this story is going. I do, because on occasion I have seen the finished and installed products while listening to the consumer complain. There is no free lunch.
As a consumer, always request small samples from all vendors while in your initial conversations. Then as the price is being negotiated, include a foot-long (full-scale) sample section of the railing, for example. Have this large sample supplied with the applied finish (paint) so you know exactly what you will be receiving.
What works well on both ends, is having the iron shop make two samples. The shop keeps one sample and you retain the other until the work has been installed. This assures you of exactly what you will be receiving and the shop can refer to their sample while building your project.
A perspective client once told me that she wanted to work with people who were members of the “no surprises club.” I think we all feel this way. A vendor is no more interested in reworking your ironwork than you are in not receiving what you had envisioned.
Good luck. The joy is in the journey.
Robert Walsh is the founder of the R. Walsh Gate & Railing Company, a cottage industry of blacksmith shops, located mostly in the Upper Midwest. Walsh and his colleagues have been hand forging fine architectural metalwork for 25 years.